Smart Scheduling - Configuring Resources
To take full advantage of PatientNow's updated Smart Scheduler (See "Smart Scheduler - Update Overview,") it is necessary to set up the practice's resources appropriately. Resources refer to:
- Rooms
- Equipment
- People (ie. providers)
PatientNow allows practices to attach their rooms and equipment to specific facilities. By doing so, PatientNow's Smart Scheduler will be able to assign treatments to particular room, and/or on particular equipment automatically. Automatic assignment prevents double booking a room or equipment. Users with override privileges are able to double book a room or equipment if they choose to do so. Configuring Resources and Appointment Types (See "Configuring Appointment Types" for details) will also prevent patients accidentally double booking a Resource via My Appointments Now.
Please note that providers' default scheduling has not been changed, and is still necessary.
As you read through this article, you may expand screenshots by clicking on the image you'd like to expand.
Add a New Resource
If rooms and equipment have not yet been created as Resources, please add them to the system.
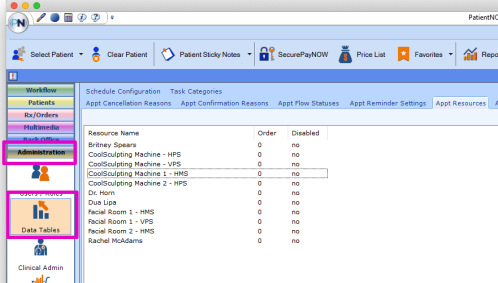
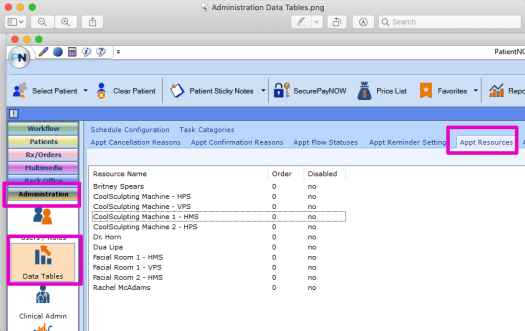
1. Navigate to "Administration" > "Data Tables" from the menu on the left.

2. Click on the "Appt Resources" tab.
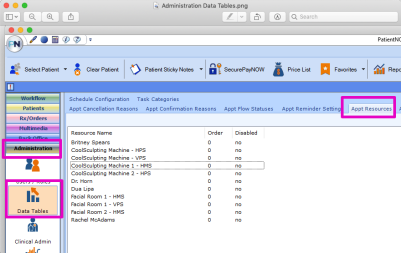
3. Click the "Add New" button in the bottom section.

4. Type in the Resource Name (ie. Injectables room #1, or CoolSculpting #1).
5. Add a Description if desired.
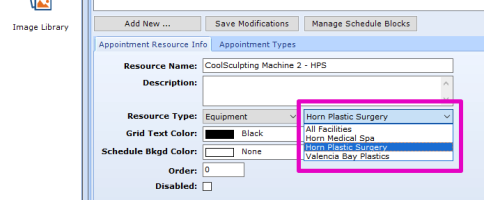
6. Choose the appropriate Resource Type (room or equipment) using the dropdown menu.
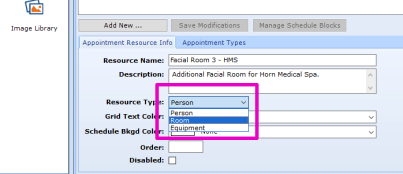
7. Choose the appropriate facility using the dropdown menu (only applicable for practices with multiple facilities.)

8. Click the "Add As New" button to the right.

Please note that if the practice has more than one of a particular equipment (ie. more than one CoolSculpting Device), it is necessary to distinguish them. The easiest way to do so is to number them. For example, "CoolSculpting Device #1," "CoolSculpting Device #2," etc.
The same applies for rooms. For example, if a practice has multiple rooms available for Facials, each room needs to be distinguished. For example, "Facial Room #1," "Facial Room #2," etc.
Assign Rooms to Specific Facilities
With the update, all rooms will be defaulted to "All Facilities." Follow the steps below to assign rooms to their appropriate facility. This is only applicable to practices with multiple facilities.
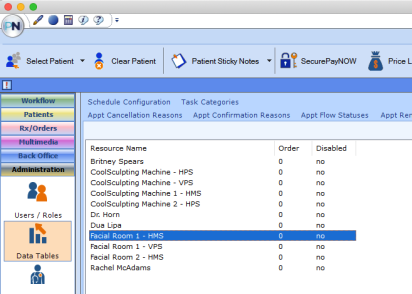
1. Navigate to "Administration" > "Data Tables" from the menu on the left.

2. Click on the "Appt Resources" tab.

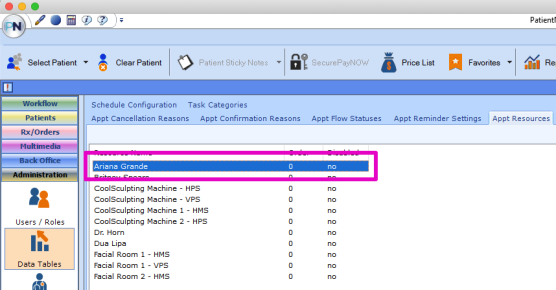
3. Click on the room to be assigned from the list of resources. If the room is not on the Resources list, it may be added. See "Add a New Resource" for details.
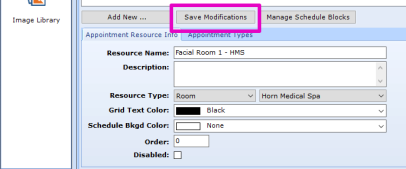
4. Click on the dropdown menu next to "Resource Type" and click to select the appropriate facility.
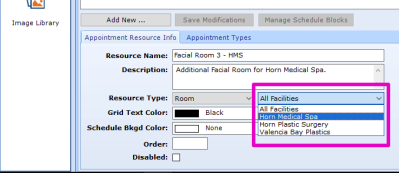
5. Click the "Save Modifications" button to save changes.
Assign Equipment to Specific Facilities
With the update, all equipment will be defaulted to "All Facilities." Follow the steps below to assign equipment to their appropriate facility. This is only applicable to practices with multiple facilities.
1. Navigate to "Administration" > "Data Tables" from the menu on the left.
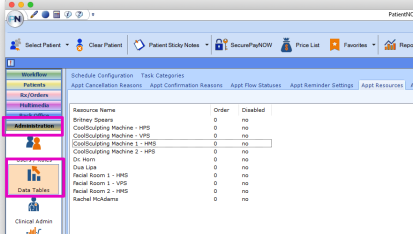
2. Click on the "Appt Resources" tab.

3. Click on the equipment to be assigned. If the equipment is not on the Resources list, it may be added. See "Add a New Resource" for details.

4. Click on the dropdown menu next to "Resource Type" and click to select the appropriate facility.
5. Click the "Save Modifications" button to save changes.
Assign Appointment Types to a Resource
After creating a Resource in the "Appointment Resources" tab, it is useful to assign the appropriate Appointment Types to the Resource, so that upon scheduling appointments, only the appropriate treatments, rooms, equipment, providers, etc. are available.
1. Navigate to the "Administration" > "Data Tables" module from the menu on the left.
2. Click on the "Appt Resources" tab.
3. If necessary, add the Resource. See "Add a New Resource" for details. Otherwise, continue to step 4.
4. Click on the desired Resource from the list in the upper section
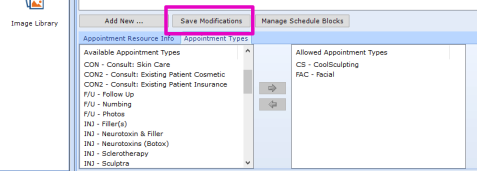
5. Click on the "Appointment Type" tab in the bottom section.

6. Click the appropriate Available Appointment Type, and click the right arrow to add the Appointment Type to the resource.
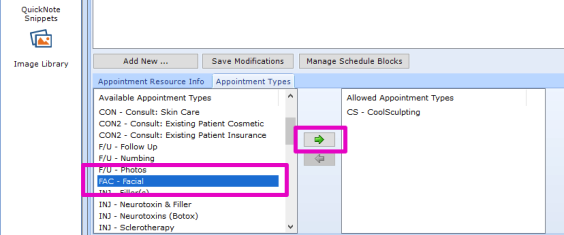
7. Remember to click the "Save Modifications" button when done, to save all changes.

Summary
Since rooms and equipment do not move between facilities, the new Smart Scheduler allows rooms and equipment to be assigned to a particular facility. With these assignments in place, the PatientNow system will know how many rooms and/or equipment are booked on a specific date and time to prevent double booking. Patients will not be able to double book a room or equipment through MyAppointmentNow either, ensuring that the practice has the resources it needs, when it needs them, for every patient visit.