Smart Scheduling - Configuring Appointment Types
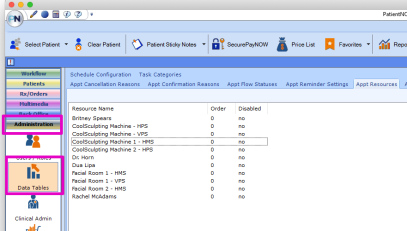
Once Resources have been set up appropriately (see "Configuring Resources" for details,) Resources can be marked as Allowed for specific appointment types. The Smart Scheduler will pull from the Allowed Resources when an appointment is being scheduled, without the need to create a default schedule for rooms or equipment. Note that default schedules are still required for providers.
While the update allows for easier configuration, please note that reconfiguring Appt Types is optional.
As you read through this article, you may expand screenshots by clicking on the image you would like to expand.
Default Set Up
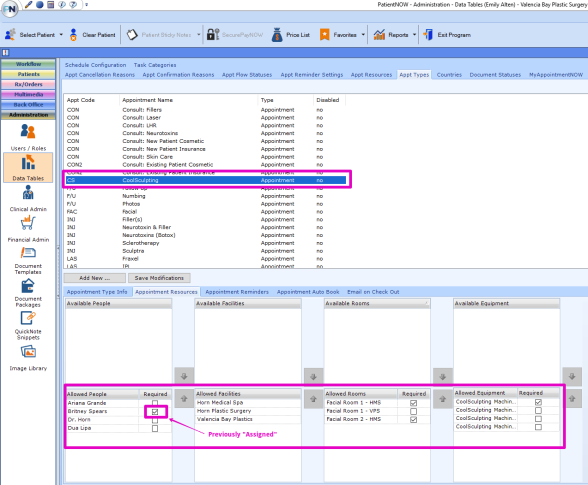
By default, the "Appointment Resources" tab under Administration > Data Tables > Appt Types will put all Providers, Facilities, Rooms, and Equipment into the "Allowed" section for any given Appointment Type on the list. Any Resource that was previously marked as "Assigned," will now have the "Required" box checked.
Configure Appointment Types
Each Appointment Type may be configured to specify which Resources (providers, facilities, rooms, and equipment) the scheduler may pull from when the appointment is being created. To configure:
1. Navigate to "Administration" > "Data Tables" from the menu on the left.
2. Click on the "Appt Type" tab.
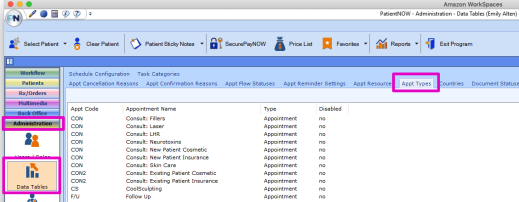
3. Click on the appropriate Appointment Type from the list in the upper section.

4. Click on the "Appointment Resources" tab in the bottom section.
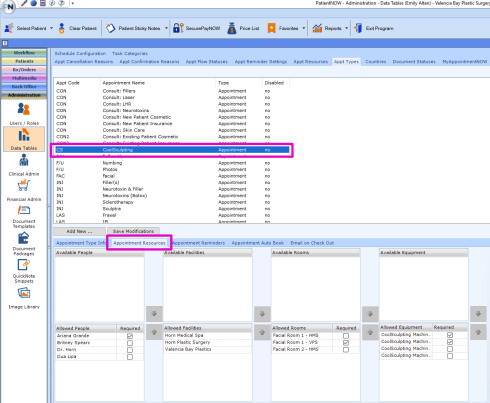
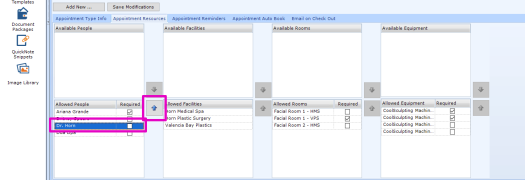
5. By default, all resources will be Allowed for all appointment types. To remove a Resource from the Allowed section, click on the Resource to be removed, and click the up arrow. This will move the Resource into the "Available" section, rather than the "Allowed" section. By doing so, that Resource will not appear in the dropdown menu when scheduling this type of appointment.
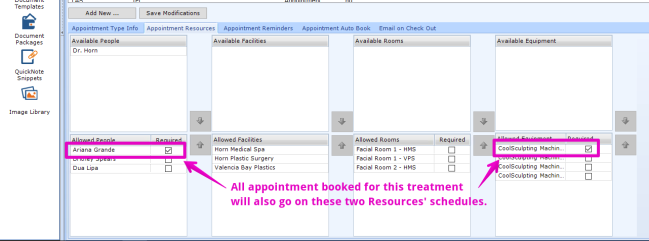
6. Click the "Required" checkbox for any Resource that is required for a particular appointment type. The "Required" checkbox will add the appointment to the "Required" Resource's schedule when booking the appointment, but does not prevent booking the appointment under a different Resource(s).
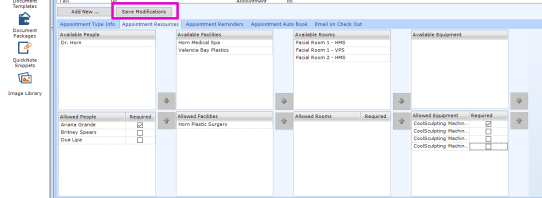
7. Remember to click the "Save Modifications" button to save changes.
Summary
The PatientNow Smart Scheduler can automatically assign Resources (providers, rooms, facilities, and equipment) when an appointment is booked. With the Smart Scheduler, a particular Resource will not be double booked unless a User with override rights chooses to do so. By configuring the appropriate Allowed Resources for each appointment type, the Smart Scheduler will only automatically assign Resources from the "Allowed" list, ensuring that the correct provider(s), facility, room, and/or equipment is scheduled.
Note that the Smart Scheduler holds all the information required for patients to schedule appropriately using MyAppointmentNow Booking Portal as well!